Welcome to the CMS User Guide!
No matter your level of comfort with technology, Marketing is ready to help any staff member learn to maintain their department’s web pages using the website CMS (Content Management System). If you wish to request access to edit your department’s web pages, please contact marketing coordinator Marie Gendron (mgendron@franklincummings.edu) to get login credentials and a short training session.
This online guide reviews typical CMS tasks and can be used to trouble-shoot common issues. But users should always feel free to contact the Marketing office with questions or concerns.
CMS login URL is https://franklincummings.edu/admin
1: Editing Existing Page Content
Two notes about editing pages:
- You can see what your edits will look at any time like by clicking the “Preview” button in the Publish box in the upper right corner of the template.
- When you’re finished with all your edits, be sure to click the blue “Update” button in that same box. Your edits will be published and live immediately. Always check the franklincummings.edu website to make sure everything looks the way you want it to.
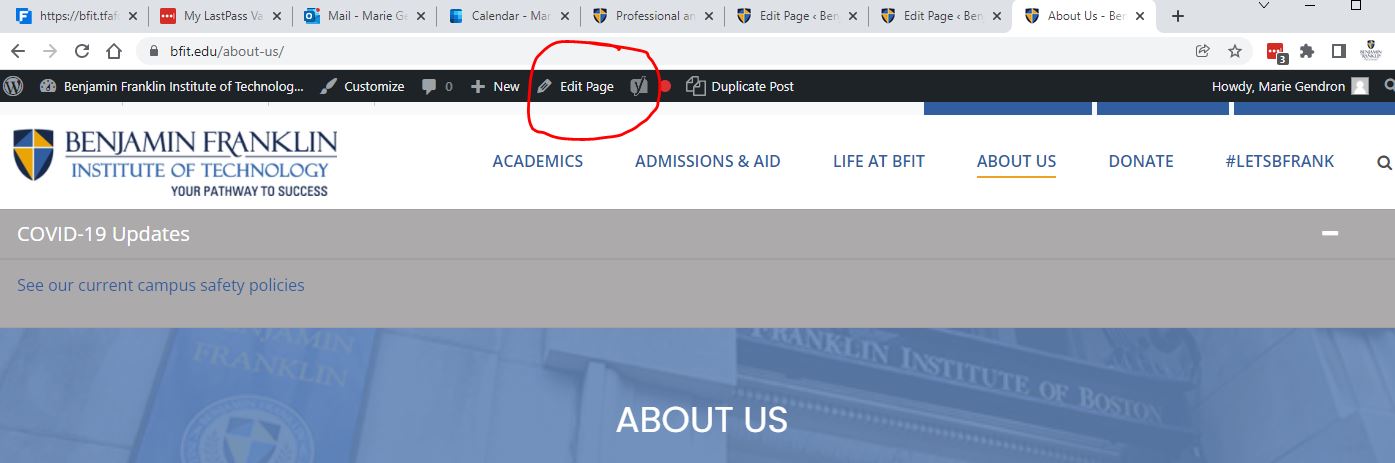
The easiest way to begin editing a page is to go to the live franklincummings.edu page you want to edit, then log into the CMS. (If don’t see a black editing bar across the top of the page, just refresh the franklincummings.edu page.) Click “Edit Page” to open the editing template for that page:
Alternately, you can find pages from within the CMS. Click the Pages link in the grey left-hand column, then type the first few words of the page name (the title that appears on the live page) into the Search Pages box in the upper right and hit Enter. A list of matches should appear. Click on the page you want to edit.
- Body Text and Images. This is the first section on the Template. It is where the main content for most web pages should go.
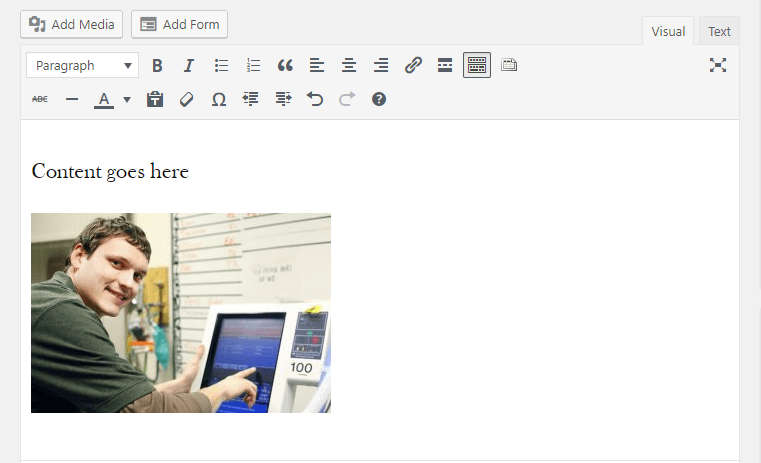
Adding/editing Text: The icons for text editing in the CMS editor area based on Word and work pretty much the same way. To add new text to the page, you can simply type it in or copy/paste from a Word doc. To add new formatting, highlight the text, then choose bold, link, etc.
NOTE: You can use the dropdown options in the Paragraph box to add sub-headings to break up your text, but NEVER choose Heading 1, only Heading 2 or 3. Heading 1 is automatically assigned to the title at the top of each web page. Having multiple H1s on a page causes our site to be penalized by search engines.
Adding/editing Images: You can add images by putting the cursor where you want the image to go and clicking the “Add Media” button above the text editing icons. You can either upload a new image or choose one from the Media Library.
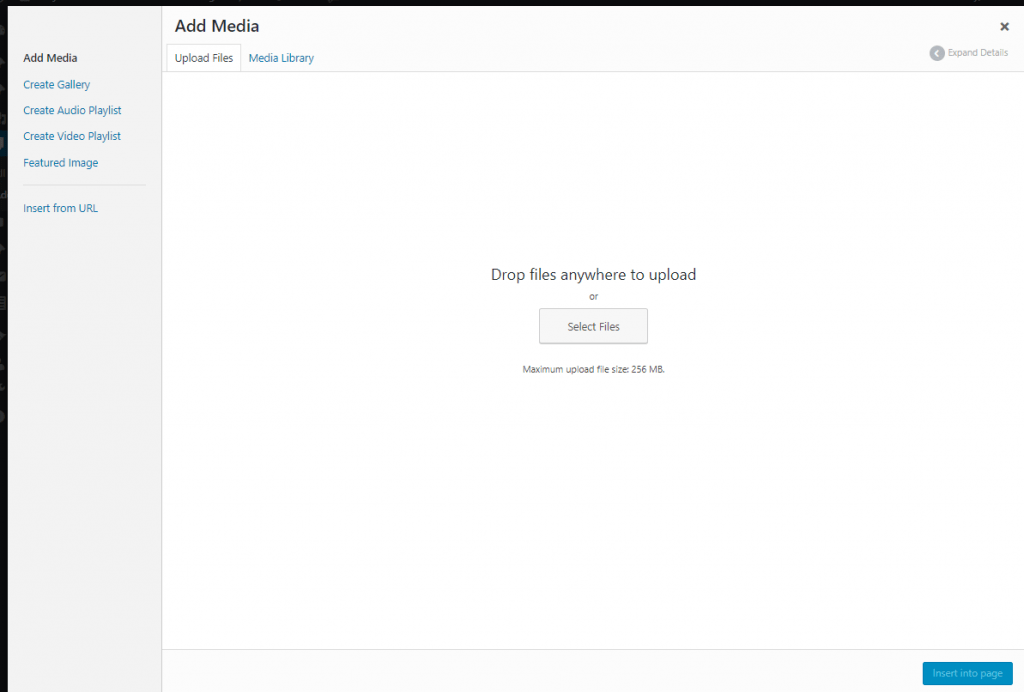
NOTE: If you upload a new image, please be sure to resize it so that it is less than 1 MB in size BEFORE you upload it. Larger images make a page load slowly, frustrating users and penalizing the page in search results.
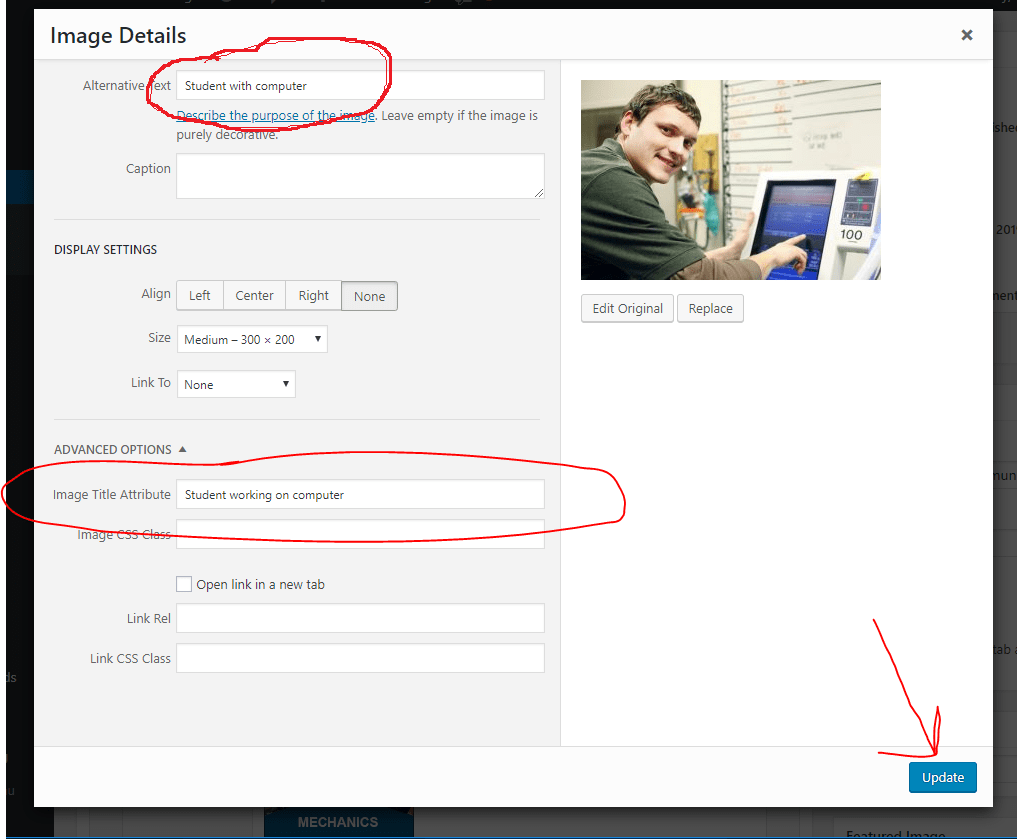
Once the image is on the page, edit the image details (size, alignment with the text, and other settings) by clicking anywhere on the image, then choosing the pencil icon. Click the blue Update button at the bottom right of the edit box to save your changes.
NOTE: Please be sure to add a short description of the picture into the Alternative Text box in the image editor—this information is vital for visitors with low-vision (or those who have image-display turned off on their device).
Easy way to create a small photo gallery on a CMS page: Open the CMS page where you want to add the gallery. In the spot where you want your gallery to appear, click the Add Media button. Click the Create Gallery option from the left column:
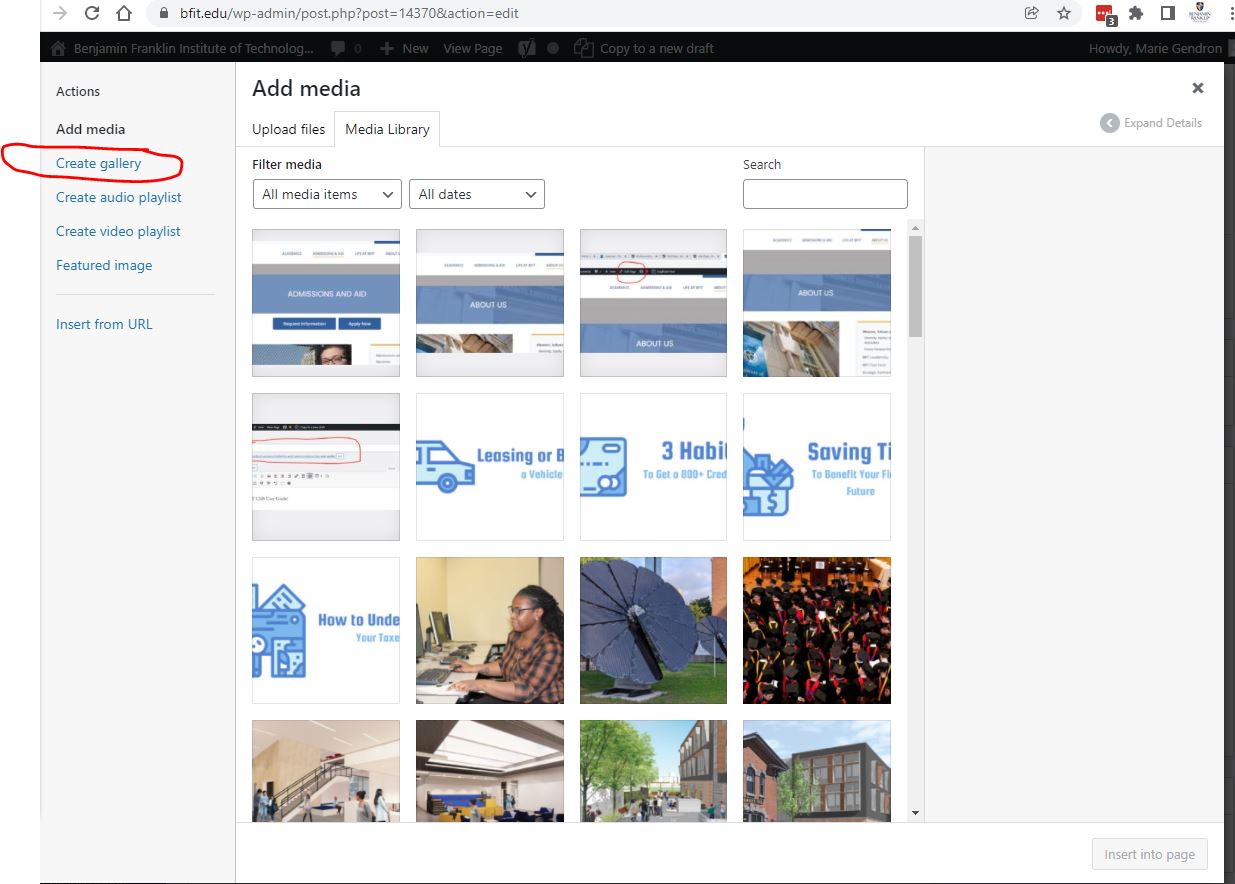
Either upload your images (images must be smaller than 1MB) or click on existing uploads (use ctrl button to check multiple files) to add them your gallery. Click the blue Create a New Gallery button at the bottom of the library. You can then drag and drop your images into whatever order you want and can also set the # of columns for your grid. Always choose Thumbnail sizing. Photos will expand to full size if people click on them.
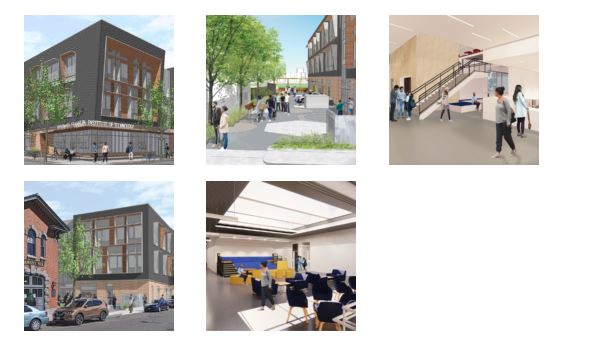
Finished photo gallery will look like this–WordPress will automatically add spacing and make the grid mobile adaptive:
If you want to edit your photo gallery later, just click anywhere on it and click the pencil (edit) icon.
2. Other optional fields to customize your page content:
- Yoast SEO: Do not edit this field; it will be completed by the site administrator.
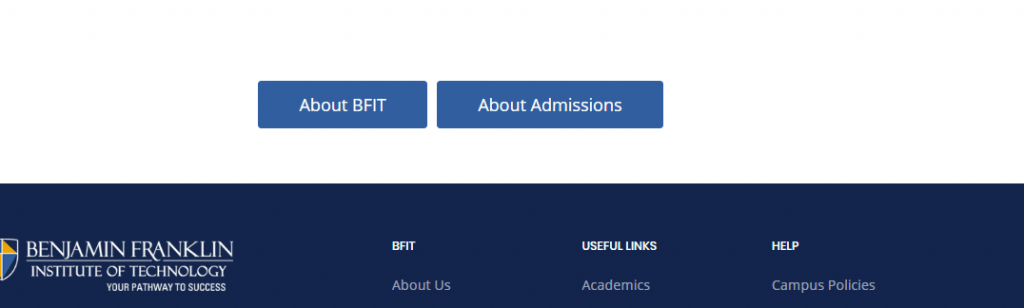
- Bottom Tab Section. This feature is not commonly used, but it allows you to add a small blue link box or boxes to the bottom of the web page. The box(es) will appear AFTER all other content on the page, just above the website’s blue footer field. To create a new Bottom Tab, click the blue Add Row button, then add a short title and the full URL link of the page where you want the button to go.
Here’s what the Bottom Tab boxes look like on the website:
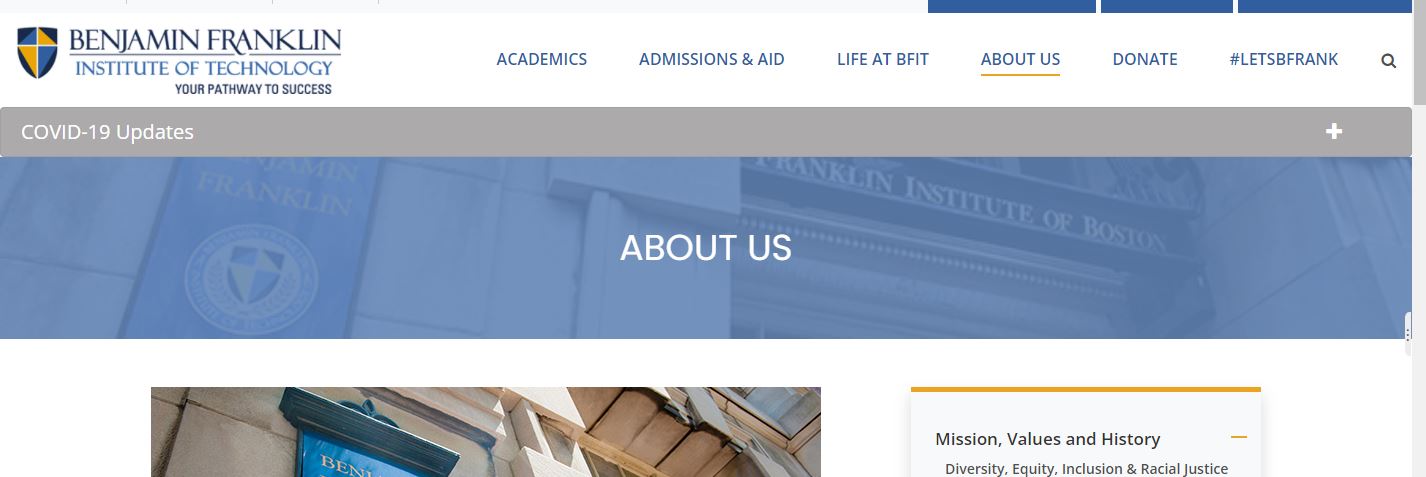
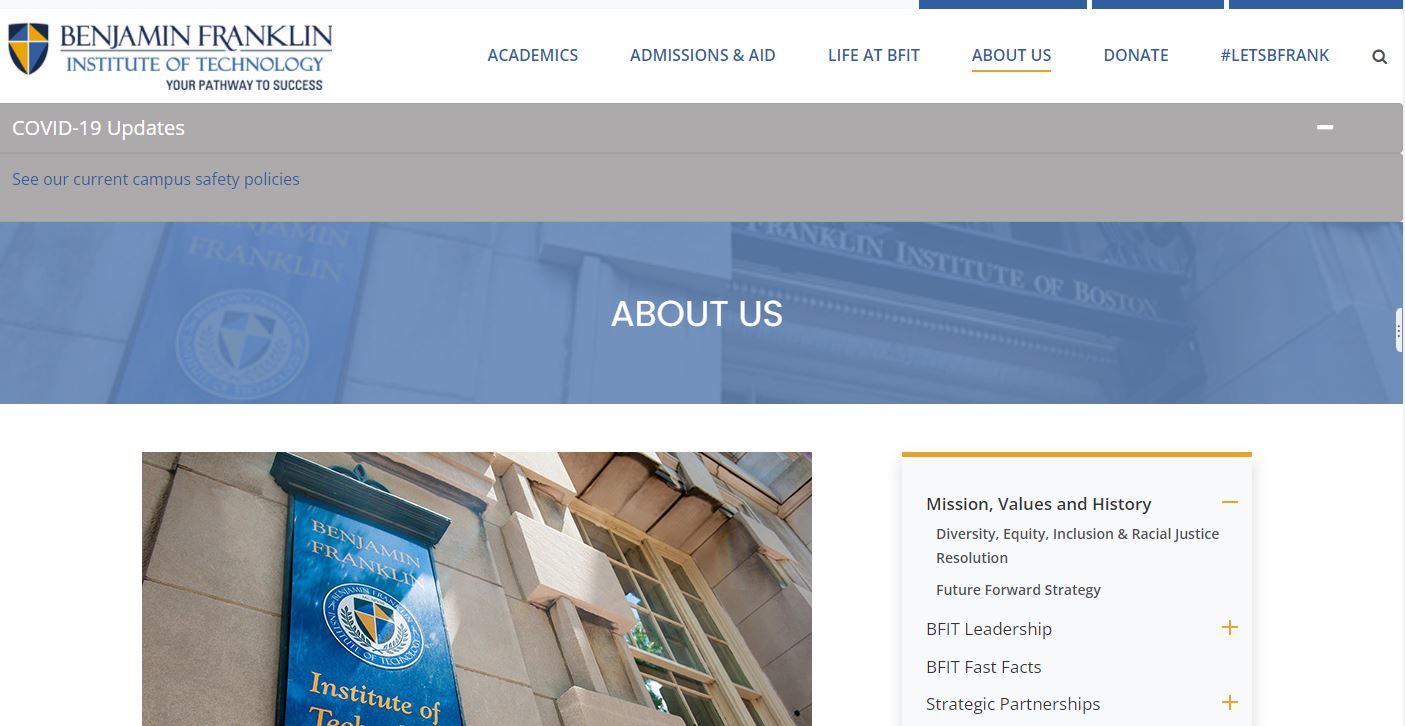
3. Page Header. This allows you to display an image behind the blue title bar at the top of your page. The CMS will automatically convert a portion of the image to a narrow vertical bar.
Here’s what the Page Header looks like on the About Us webpage:
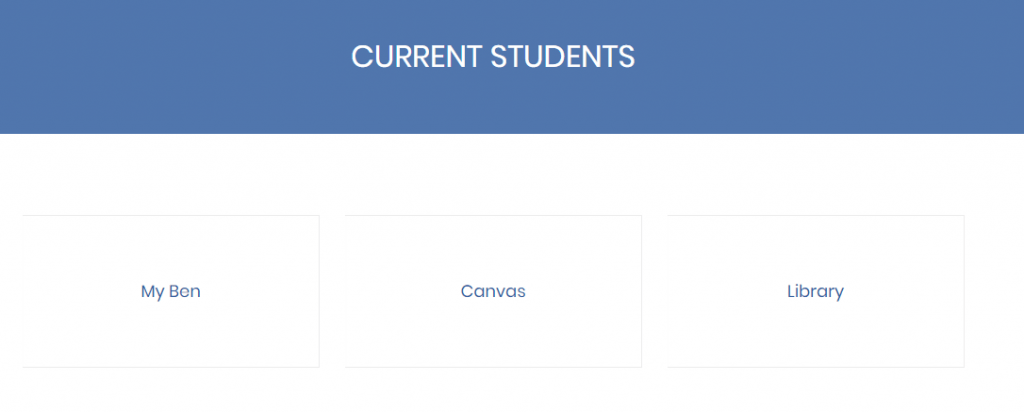
4. Page with Bottom Repeater: Use this when you want to create a section of clickable link boxes to send visitors to additional content. The links can go to other pages in our website or to an outside website.
Here’s what the Bottom Repeater feature looks like on the Current Students webpage – the clickable links are the boxes labeled My Ben, Canvas, and Library:
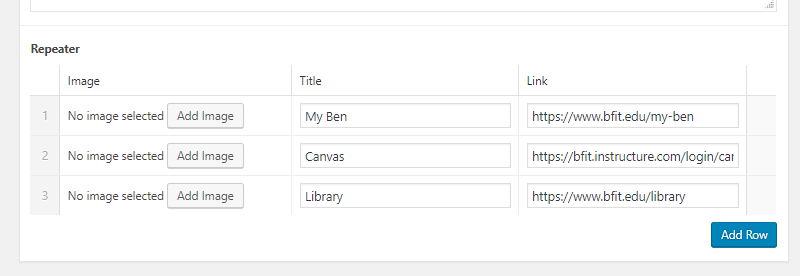
To create a Bottom Repeater feature:
- Fill out the content field above the Repeater section if you want to include any intro text above the links. This is optional.
- Fill out the Repeater field. Click the blue Add Row button and then complete the Image, Title, and Link field. Paste in the full URL for the link, for ex. https://www.franklincummings.edu/our-history/
See this example from the Current Students webpage template:
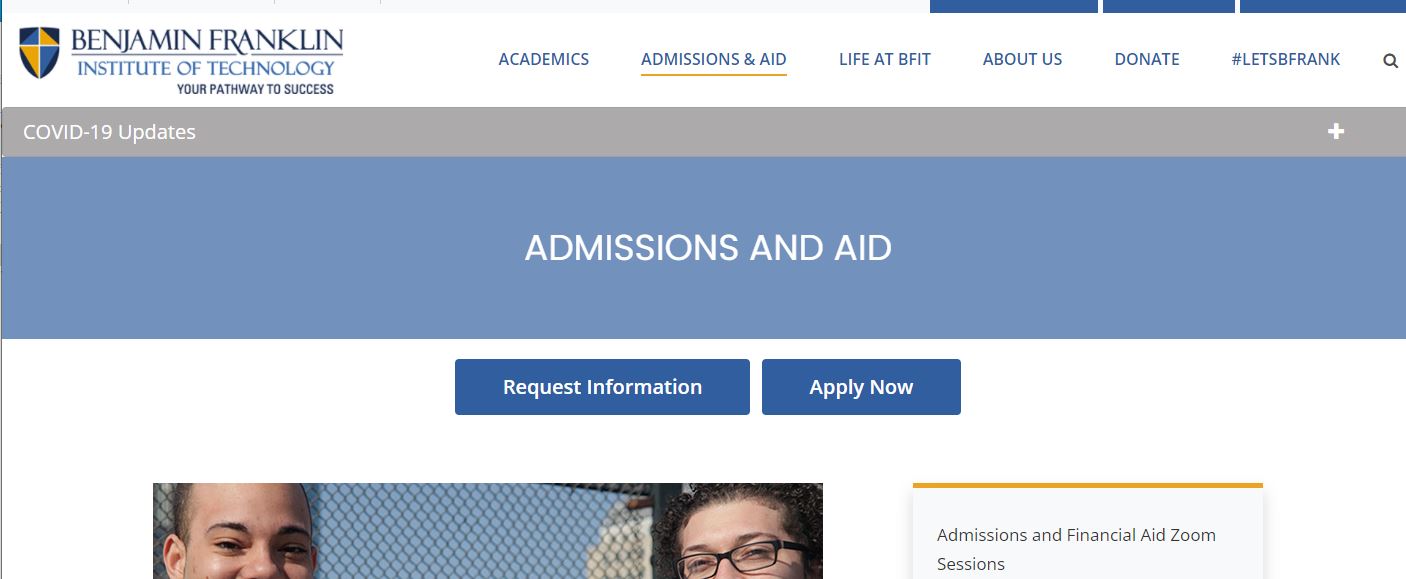
5. Top Tab Section: Use this to add small call-to-action boxes to the top of your page. These buttons will appear above ALL other content on the page. Typically, these links are used for Apply Now/Register Now messages.
Here’s what the Top Tab buttons looks like on the main Admissions webpage:
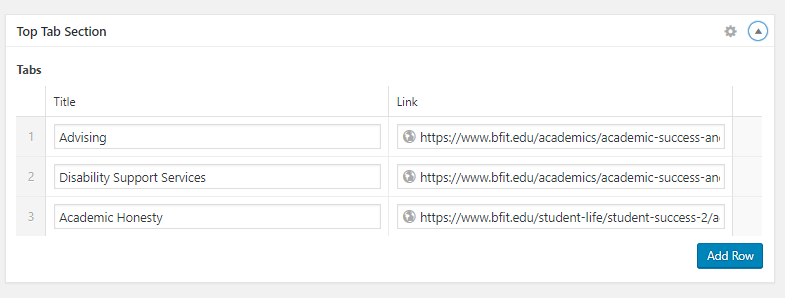
To create or edit Top Tab buttons, fill in the Title and Link fields. The link should be the full URL of the page you want the button to go to. You can add a new button by clicking the Add Row button on the bottom right.
See this example from the Academic Success and Support webpage template:
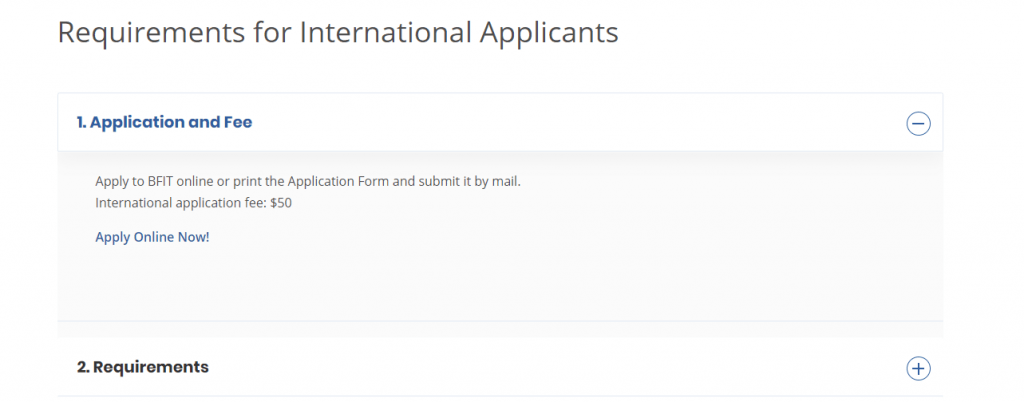
6. Accordion with Title and Download: This feature allows you to group text into sections that can be either contracted or expanded. Users see only page titles upon arrival at the page, but they can expand each section by clicking a + button. This feature can be used to provide overview of required steps, without overwhelming the visitor with all the supporting content at once.
See this example from the Admissions instructions for International Students web page:
7. Video Section: Please contact mgendron@franklincummings.edu if you want to add a video to your webpage.
Publishing Web Pages
When you are finished creating or editing your page, click the blue “Update/Publish” button. The page will publish immediately. You should go to the live site to double-check that everything looks the way you want.
NOTE: If you have created a new page, please send an email to mgendron@franklincummings.edu with the new page URL so the administrator can fill out the SEO (search engine optimization) fields on your new page. This will help the page appear higher in search engine results.
SECTION 2: Creating New Web Pages
IMPORTANT: Be sure to click the “Save Draft” button in the Publish box on the right side of the page occasionally to ensure you don’t lose any work.
Step 1. Log into the CMS (https://franklincummings.edu/admin) Contact Marie Gendron in Marketing to request login credentials.
Step 2: Click the blue +NEW button at the top of the screen and choose Page from the dropdown menu (alternatively, you can click the Pages button in the left-hand column and choose “Add new”). Type a page name into the top field–this will be the name that appears on the top of the live page, as well as the name that appears in the right-hand navigation:
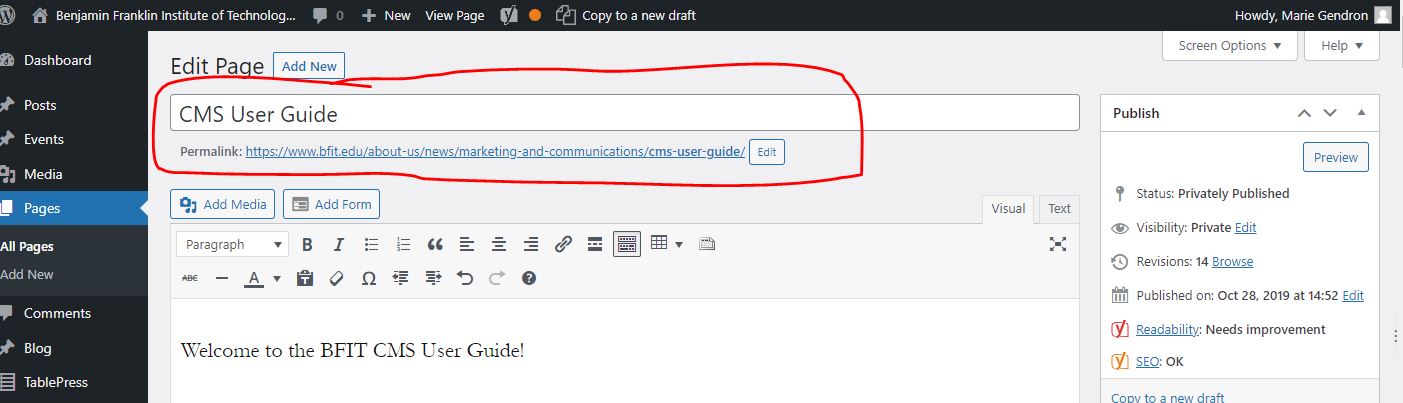
Step 3: Edit the permanent page URL (if you wish). The CMS will automatically include your full page title in the URL, but you can shorten it by editing the “Permalink” field right below the page title (see screenshot above). Simply click the edit button and type in whatever you want the end of the URL to be. Remember to separate words with hyphens, e.g. ‘cms-user-guide’.
Step 4: Review/set your Page Attributes using the Page Attributes box on the right-hand side of the page:
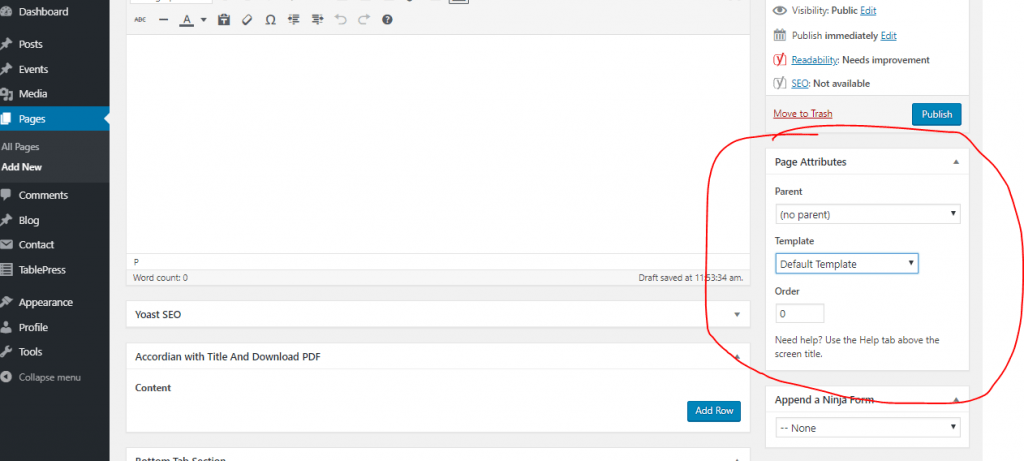
The Parent drop-down box will determine your page’s URL and its location in the website navigation. For example, a page with About Us as a parent would have the URL https://franklincummings.edu/about-us/your-new-page-title/ and the page will appear in the About Us page’s drop-down navigation list:
You can also choose a page template from the Page Attributes box. The template determines what features are available to include on your web page and how the page will look once it’s published.
Overview of the 2 most commonly used Page Templates:
- Default Template: This template should be your choice for most website pages and it is the default setting each time you create a new page. The Default template has the most options to customize your page. You can add text, headlines, links, header and body images, navigation buttons at the top or bottom of the page, and more. There are also advanced options to add tables or embed forms.
- Meet the Staff Template: This special template allows you to easily create a staff page with names, bios, photos, and contact info in a nice grid layout. To create a Meet the Staff Template, simply choose that option from the Template dropdown.
NOTE: If you need to create a page using a template besides the Default or Meet the Staff templates, please contact Marketing for help.
The Order box in the Page Attributes section is used to change the order in which your pages appear in your parent page’s drop-down menu. The default is for pages to appear in alphabetical order. If you want to adjust the order of the pages in your parent section, please contact Marketing.
Step 5: Add your content. See detailed instructions under Creating /Editing Page Content section.
Publishing Web Pages
When you are finished creating or editing your page, click the blue “Update/Publish” button. The page will publish immediately. You should go to the live site to double-check that everything looks the way you want.
NOTE: If you have created a new page, please send an email to mgendron@franklincummings.edu with the new page URL so the administrator can fill out the SEO (search engine optimization) fields on your new page. This will help the page appear higher in search engine results.
